Friday, June 29, 2012

Anaerobic Waters are found Worldwide


Anaerobic waters can be either salt or fresh that are suffering from a depletion of oxygen.  An example of a salt water body that suffers from depleted oxygen is the Black Sea.  The lower levels of this sea cannot support life except for some anaerobic bacteria, a form of bacteria that doesn’t need oxygen to support its life functions.

Generally, the bottom of anorexic waters have a depleted oxygen level, and an elevated level of hydrogen sulfide that is generated by the decay of organic matter that settles to the bottom of a body of anaerobic water.  This is usually the bottom layers of a closed body of water such as a lake or an arm of the sea that is isolated from the oceans in general with the anaerobic waters settling to the bottom. 

Anaerobic water is not limited to large bodies of water it can occur anywhere there is a body of water that is receiving an over supply of organic matter, or other oxygen depleting chemicals.  These are usually nitrates and phosphates that act as nutrients in the water.  It is a bloom of lifeforms feeding on these nutrients that by dying and decaying cause the water to become anaerobic

One of the places that this is apt to happen is in a sewer, or septic tank.  The anaerobic bacteria that are found in such places generate copious quantities of hydrogen sulfide that causes the stink that are associated with such places.  The lifeforms found in such waters get their nourishment mainly from sulfur bearing compounds.  Under the same conditions the sulfur bearing compounds combine with dissolved iron in the water forming pyrite that is iron sulfide.

One of the families of anaerobic bacteria is the botulism bacteria that are one of the deadliest diseases to afflict mankind.  This forms under conditions of depriving a source of nutrient of a supply dissolved oxygen, such as in canned goods that are improperly canned allowing the contents of the can to decay in an anaerobic condition fostering the growth of the botulism bacteria. 

This bacteria is present as spores on many foodstuffs that are canned, the most common cause of botulism poisoning is found in canned goods that weren’t brought to a high enough heat to kill the botulism spores. 

Anaerobic bacteria also perform another function producing both carbon dioxide and methane.  Usually this vents to the open air, but both of these gases are greenhouse gases.  The buildup of carbon dioxide in the atmosphere is blamed for global warming, but methane is an even stronger green house gas. 

Methane is also “natural gas” that has a multitude of uses in the modern world.  Many of us cook our meals or heat our homes on natural gas.  The same natural gas also is used by many power generating companies to produce electricity.  When it is burned it does produce carbon dioxide, but not in such great quantities as coal or oil. 

Many people take advantage of this methane production to power or heat many different devices.  One example of this is the collection of methane production to operate modified diesel engines that power equipment around a waste water facility.  Other uses for it are found around dairy farms and commercial feedlots that are equipped with special methane generators that digest the cow manure to produce methane that is used as a fuel.

Acid Rain an Environmental Scourge:


An acid rain damaged gargoyle
Photo by Nino Barbieri  


Acid rain is rain or any other form of precipitation that is unusually high in acid content from natural or demographic sources.  It is produced by burning sulfur containing fuel such as coal or petroleum or by nitrogen combining with oxygen during the process of combustion.  An associated source of acid rain can be found in the minerals found in the fuel.  This takes the form of toxic minerals of which many can be found in nature.  Acid rain is also produced from many different sources.  Volcanic activity is one of the many sources, so is ocean spray.  It is particularly damaging to animals, vegetation and buildings.  In the later 20th century many governments have taken steps to alleviate the problem by enacting laws to reduce these emissions.  The term acid rain has entered the popular language as any type of water particle carrying airborne acid.  A closely allied problem is the depositation of trace elements into the air from trace elements contained in the natural and demographic sources. 

Acid rain is a manifestation of a larger problem air pollution that becomes excessive in areas suffering from poor atmospheric circulation as the Los Angeles Basin.  Here a combination of a high range of mountains encircling Los Angeles allows stagnate air to accumulate over Los Angeles allowing the air to become heavily polluted.  Although draconian measures have been taken over the past half century air pollution is still a major problem.  The unfortunate for the residents of the city a good share of the air pollution is from the burning of fuel by those same residents.

As can be seen on Figure 1 the heaviest concentration of acid rain is in the northeastern part of the country and adjoining Canada.  Much of this is acid rain caused by the combustion of coal in coal fired electric generating plants located in the north central part of the country along the lower Great Lakes and east to the Atlantic Ocean.

Since the start of the industrial revolution in the 1700s acid rain has increased due to the emissions of sulfur dioxide and nitrogen oxides into the atmosphere.  Although acid rain was discovered in 1852 it wasn’t until the 1960s that scientists started to investigate the problem.  The name “Acid Rain” dates from 1972 when the Canadian Scientist Harold Harvey was one of the first scientists to study a “dead lake.”   The New York Times made the public aware of the problem through reports about the Hubbard Brook Experimental Forest in New Hampshire outlining the numerous deleterious effects on the forest as a result of Acid Rain.

Acid rain is measured by taking a series of samples throughout the suspected affected area and measuring their pH.  Neutral or distilled water has a pH of 7 anything below that level is acidic; anything above pH7 is alkaline.  By measuring a series of samples over a wide area then comparing the results a map of the affected area can be generated.  This map will help scientists to trace their way back to the source much as a prospector traces a placer gold deposit back to its source as a lode deposit.

The reason why there is such a concentration of acid rain in the Northeast is because caused by the concentration of cities, and the heavy industrialization of the Midwest and the Northeast.  Coal fired power plants located in the Midwest are blamed for much of this pollution.  This is combined with the prevailing soil and bedrock in the Northeast being unable to generate enough dust to neutralize the acid rain.  The reason the Northeast receives so much acid rain from the Midwest is because of the prevailing
Westerly winds.   

There is no easy solution to this problem except to try to discover methods to decrease pollutants in the atmosphere.  To address this problem there have been concerted efforts by both government and private institutions. 

References:

Acid Rain, Wikipedia, the free encyclopedia, http://en.wikipedia.org/wiki/Acid_rain

What is Acid Rain, USGS, http://pubs.usgs.gov/gip/acidrain/2.html

Manahan, Stanley E., Environmental Chemistry Fourth Edition, © Lewis Publishers, 1990, Pages, 9, 10, 48, 286, 327, 336, 427, 486

Wednesday, June 27, 2012

How the Universe was Formed


The origin of the Universe
Author Fredrick


Most people would not consider the formation of the Universe as a part of geology but it is.  In order to make sense of geology one has to know where it all came from; hence the formation of the Universe. 

The closer you get to the beginning it seems that the closer you get to God.  The first book of genesis in the bible gives as good of an explanation as any of the scientists have been able to conjure.  It simply says, “Let there be light,” and that was what happened.  Scientists that deal in such matters are called “Cosmologists,” the amazing thing is that the same name is applied to theologians studying the same thing.  The “Big Bang” is the common name applied to the beginning of the Universe; it is also called the “Singularity” by some scientists.

One thing that is certain is that all the matter in the Universe came from this one event, but not in a form that we would recognize.  Our curiosity has driven us to question the beginning of the universe?  Where did the matter come from?  How old is the universe?  How did it get created?  Even modern science has not been able to answer these questions, and a good deal of what we know is pure speculation.  Modern science is not able to add firm answers to these questions bringing in them beyond the realm of hypothesis.

Of course for any question that is answered the answer generates a plethora of new questions.  Of these questions one of the most vexing is, “how many universes are there?”  We do know that our universe is finite in size, so what occupies the rest of the Cosmos?  One of the theories that has been put forth is that our universe is only one of an infinite number of universes.  If there are parallel universes do we exist on them also?  If we exist on these parallel universes is it possible for us to go from one universe to another?  And even more vexing question is if we do need to exist in parallel universes are we the same person?  Does this explain the paranormal existence of the doppelgangers, our spiritual doubles?  As a matter of fact it actually brings up the question is there a God?

For scientists that for the most part are believers in God this is probably the most vexing question of all.  This brings forth the question, “Where did this all come from?”

Laymen look upon this as some sort of vast explosion, but it really isn’t.  The beginning of the universe really happened more like someone inflating a balloon that has been expanding ever since.  Although genesis says, “Let there be light,” for the first hundred million years or so of the universe’s history there was no visible light.  It wasn’t until the first proto-galaxies appeared that light may have become part of the universe.  

According to NASA the universe was born 13.7 billion years ago.  It was about 300,000 years later that hydrogen atoms were able to capture electrons forming the first atoms.  Six hundred million years after the Big Bang the first galaxies were formed.

Tuesday, June 26, 2012

Thirteen Thousand Years ago Fragments of a Comet could have collided with Earth


Woolly Mammoth
By Tracy O


It is been postulated that the earth was barraged by a cloud of debris from a disintegrating comet 13,000 years ago. The degree of fragments raining down on the earth could have resulted in a series of mega ton explosions similar to the Tunguska event of 1908 in Siberia. Instead of this 4 km in diameter comet instead of striking a single blow in the ice sheet covering North America could have broken up into smaller fragments that had the effect of a shotgun blast on the surface of the earth.

By that time the earth was pretty well populated with humans and an event of this sort would have been handed down word-of-mouth for thousands of years later. This may be another explanation for some of the events that occurred in the Bible. One of the effects would be mega-tsunamis that could very well explain the legends of floods that are found all over the world.

The breaking up of this comet would've resulted in a series of fiery blasts that would have been as deadly as one big impact. It may be one explanation for the demise of the North American mega-fauna. The impacts could have also caused the deaths of many other animals including humans. There have been frozen mammoths found in Siberia that still have fresh butter cups in their mouth. Their deaths have been a mystery ever since discovering the first frozen woolly mammoth as to why they had fresh vegetation in their mouths. It appeared that they had all been killed instantly.

A possible explanation could be that the impact of a giant meteorite could cause shockwaves that are manifested by high velocity winds striking all at once that would have been able to kill everything they struck.

The proposal for this happening comes from Bill Napier, an astronomer who works at Cardiff University in England. In 1982 Napier along with Victor Clube co-authored a book that is titled The Cosmic Serpent. In this book they suggest that the outer planets sometimes divert giant comets from their orbits allowing them to penetrate the inner solar system. They propose that one of these giant comets had entered the solar system 20,000 to 30,000 years ago that over thousands of years the giant comet broke up into a series of fragments.

They developed a new theory based on this theoretical comet known as the theory of constant catastrophism where they claim we are living in a time of increased meteor impacts. The theoretical comet left behind it the Taurid meteor shower along with the comet Encke and a whole collection of other debris's.

In a new paper on display at www.arix.org that is to appear shortly in the monthly notices of the Royal astronomical Society in London. In this paper Napier explains that the real catastrophe was the Earth hitting a clump of debris that came from a comet that was 50 to 100 km in diameter.

It has been theorized that running into thousands of fragments from this comet would've been just like running into the blast from a shotgun. It is felt by Napier that this is more likely to have happened than a single large collision.

Even if this didn't happen 13,000 years ago there was a different kind of catastrophe that did occur than with the sudden drainage of a huge lake in Canada holding meltwater at the edge of the North American ice sheet. This lake at a cumulated as the glacier melted because it didn't have any place else to go. Whatever held this lake in place eventually broke down or melted causing a tremendous flood.

For years geologists have looked in vain for evidence that this flood went down the St. Lawrence River Valley. A recent paper however shows that some 9500 km³ of water drained out through the Mackenzie River instead. Wallace Broeckner of the Lamont Doherty Earth Observatory in Palisades New York suggests that an Arctic release of this nature might have been an even better trigger for initiating the cold spell that happened over 13,000 years ago.

References:

Did an Exploding Comet cause Extinctions 13,000 Years Ago, Fraser Cain, Universe Today

Did a Comet Swarm Strike America 13,000 Years Ago, Jeff Hecht,
New Scientist,

Mega-flood Triggered Cooling 13,000 Years Ago, Reuters, http://www.reuters.com/article/idUSTRE62U44D20100331

What makes Rubies Red


An uncut ruby crystal on a limestone matrix
Photo by Rob Lavinsky


Why rubies are red is a question that many people ask themselves when they see this beautiful gemstone that is a member of the larger family of gemstones that are termed corundum that are naturally occurring crystals of aluminum oxide. Pure corundum itself is colorless, but the interjection of those specific metallic ions as an impurity is what gives all these gems their color. It is a specific type of impurity chromium ions that are found replacing some of the aluminum ions in the ruby crystal creating the red color. Other members of the corundum family are also colored by the same mechanism only with different ions, or combinations of ions replacing the aluminum.

In the case of rubies the color you see, red, is because all the rest of the colors of the rainbow are absorbed within the crystal structure allowing you to see only red. The entire range of colors that is seen in the family of corundum gemstones is also based on the same mechanism of absorbation caused by different metallic ions that have different levels of energy. The ruby actually has two large absorption bands one of which transmits blue, and the other transmits red.  These bands are 480 nm in blue and 610 nm in red because the 610 nm is more highly energetic and the light coming from the 480 nm scale. In effect the red light coming from the gem blanks out the blue light.

A cut ruby with inclusions
Photo by Humanfeather


The amount of chrome that replaces the aluminum ions in the crystal lattice determines the density of the red that is going to appear; the more chromium there is the deeper the red color will be.

Geologically it takes a special set of circumstances to produce corundum, and especially the variety that we call Ruby. The best rubies in the world are produced in the Mogok Valley of Myanmar. Other rubies are also found in Sri Lanka, Madagascar, Africa and in the Cowee River Valley outside Franklin, North Carolina.

The finest color for Ruby is what they call pigeon blood red that is a deep red with almost bluish flashes when moved around in the daylight. Rubies also fluoresce under ultraviolet light source, and in some specimens it is even possible to see they also fluoresce under the influence of sunlight.

A red version of this star sapphire would be a star ruby
Photo by Ligar


A large ruby gem weighing more than 10 carats is the most expensive gemstone on earth being higher-priced than the finest diamonds. Large masses of imperfect ruby crystals are used extensively for carving. Many of the rubies that are on the market have been heat-treated to remove the needles of titanium dioxide that causes them to become cloudy; insert cases however the same needles of rutile produce a star effect called asterism that causes a star to appear on the face of a cabochon cut stone. Some of the stones can be almost as valuable as a regular faceted gem.

Planting in a Flower Pot


Flower pots waiting to be used
Photo by Rod Allday


When it comes to planting in a flower pot most people don't have the slightest clue about what they are doing; they just fill the pot with potting soil. This works after a fashion, but there are right ways to do everything. The purpose of this article is to tell you the right way of how to plant in a flower pot.

You started the bottom warbles flowerpots have a small hole to allow for drainage. Cover the small hole with a piece of broken flowerpot, or the plastic lid from a bottle that has a series of holes cut in its bottom that will also promote drainage. This lid is placed upside down on the bottom of the pot so that it covers the hole completely.

Once the lid is a place cover the bottle cap completely with three-quarter inch gravel or crushed stone. On top of this layer continue with about an inch of 3/8 crushed stone. When this layer is in place add another inch of clean sand. On top of the sand place a layer of peat, or you can substitute by using a thin layer of crumpled up facial tissues.

The purpose of the facial tissue or peat is to retain some moisture in the pot without the plants becoming waterlogged.

Fill rest of the pot with a good potting soil of your choice or one that you make yourself. Many potting soils are formulated with a particular type of plant in mind. Be sure you match the potting soil with the planet type you are going to have in the flowerpot.

These measurements can be adjusted to take into consideration different sized flowerpots it is obvious that you wouldn't want to use the same set of measurements on the flowerpot that is 3 inches by on one of his 2 feet high.

When you are planting in a pot you can use either seeds, or seedlings. You should match the size of the plant to the size of the pot even though you are starting from seed. Sometimes you can use several seeds per pot; at other times you may be using bulbs instead. As a general rule depending on the size of the grown plant bulbs may be either planted singly as in the case of the amaryllis or in small groups as is the case of the daffodil or iris. 

How to Plant Seeds Indoors:


Kiwi fruit seeds
Photo by Frank Vincentz


How to plant seeds indoors depends strictly on what you're going to do with the plants once they come up.  The first thing that you should do though is find a sunny window in your house and that is where you ultimately will put the seeds once you've planted them in a seedbed.

If you are intending the plants to be transplanted outdoors it is usually enough to sow the seeds in the large flowerpot with planting soil.  Indoor plants are usually planted one seed at a time in a small flowerpot

For seeds it then planted in a large flowerpot as a seedbed once the plants are up and about an inch tall you can transplanted into a tray capable of having several different recesses made of plastic.  In some cases as many as six plants are placed in a single recess in the planting flat.  Other plants are placed one other time in small flowerpots.

In all cases the seedlings are initially transplanted into potting soil that has been fertilized usually with a product called Rapid Grow or a similar product. Allow the plants to grow in the growing flats until they are about 4 to 5 inches tall when they can then be transplanted into your regular garden.

No matter what else you do you have to start with clean containers to plant your seats in.  You must also provide an adequate amount of light for this can begin by setting your planters on a windowsill where they get natural sunlight.  It is often necessary to supplement this light with a so-called growing bulb that mimics the light of the sun.  With one of these lights it is often necessary to leave the seedlings under the light for 10 to 12 hours a day.  Keep in mind that as your seedlings grow they are going to require new Pots told them, or have to be planted outdoors.

There is such a wide variety of seats available on the market that is often difficult to make a choice of what you want to grow.  Too often the amateur gardener must've tried them all and quickly finds out that there is enough room in his house for them.

Another difficult thing to determine is when is the latest frost date in your area, and you want to start the seeds so that they will be ready to be transplanted after the last frost.  A very handy way of getting the right time is to mark down the date of the last frost on the calendar and plan accordingly by using the calendar as a guide.

A handy way to handle small seedlings is to make yourself an improvised trowel from a pen nib that is stuck into holder with the pointed end up solo was sticking out of the pen holder looks like a miniature trowel.  This is a technique the author became familiar with from operators of commercial greenhouses.

If you find that after a few days after coming up your plants are infested with some kind of pest act quickly because there are no natural predators for these pests indoors.  Aphids and mealy bugs are the most likely to attack your plants in an indoor setting although fungus another plant diseases are also possible.  A pest can go through a tray of seedlings very quickly and even spread to your normal indoor plants.

How to grow Vegetables in Containers:


Vegetables fresh from our containers
Photo by Biswarup Ganguly


Growing vegetables in containers has been practiced for years, but if you are a first time gardener this might be for you.  Container gardening is especially useful if you are an apartment dweller because it doesn’t take up much space, and you’d be surprised how much you can grow with this technique.

The best containers for this are wooden tubs or large terra-cotta pots.  You can buy either of these at a garden center, or even your local supermarket in the spring of the year.  Some of these stores even have used whiskey barrels that have been sawed in half.  These make excellent containers for raising vegetables.

You can grow just about any type of vegetable in a container, but you should pick those that are capable of producing the highest yield in the least space.  One of these is tomatoes.  In a large wooden tub you should be able to plant four tomato plants.  If they are supported on tomato stakes, a wooden stake about four feet tall they will produce several bushels of ripe tomatoes.  If you want you can vary the types of tomatoes you grow, but use separate containers for each breed.

The first thing you have to do is prepare your containers for planting.  Be sure they have a drain hole in the bottom, this is important so the plant doesn’t become waterlogged.  Cover the drain hole with something slightly curved like a piece of a broken terra-cotta pot.  Then put about two to three inches of processed gravel, this is a mixture of sand and gravel, into the bottom of the pot.  Place on top of this several inches or sub-soil, this is what lies beneath the topsoil in the ground.  Leave enough room for from four to six inches of potting soil that can be bought at a garden supply shop.  Now your pot is ready to be planted.

You are ready to plant your vegetables that can be either seeds or plants that are already started.  Seeds and plants are readily available from garden supply shops.  You can start some plants yourself by planting them in flats you keep indoors until the weather warms up enough to replant them outdoors in your containers.

When you first start planting add some fertilizer beneath the seeds or plants and cover it first with a small amount of soil so your plants do not come in direct contact with the fertilizer.

During the growing season you will probably have to fertilize the plants during the end of June, and again during mid-August.  It is best to dissolve the fertilizer in some water before applying.  Just apply the fertilizer with regular watering.  The plants will need regular watering throughout the season. 

How to kill Garden Slugs:


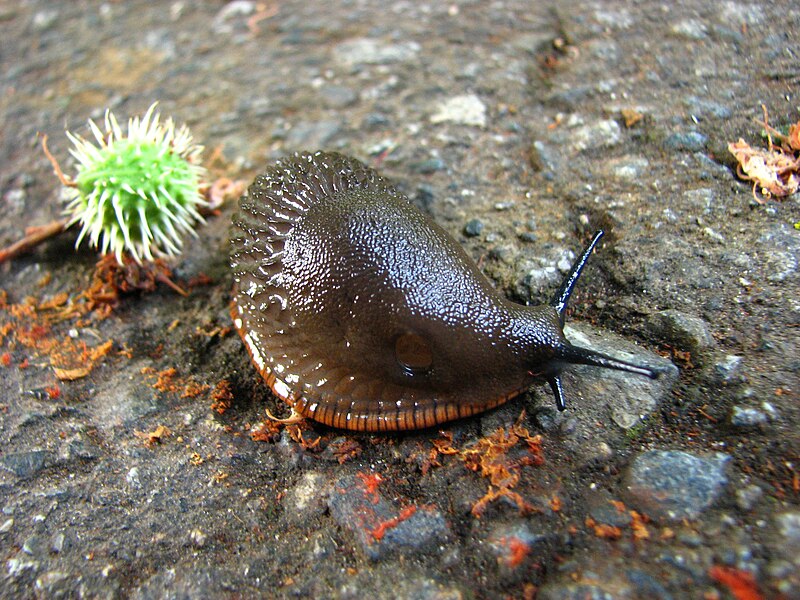
An unidentified slug in Vancouver, British Columbia
Photo by Magnus Mansk


The garden slug a mighty fellow is he; if you’re not careful he’ll eat your whole garden.  Yet getting rid of these pests is easy to accomplish.  All they really are is a snail without a shell.  There are many different ways to attack these varmints that are organic and safe.

One of the most effective ways to get these critters is with nothing more simple then a saltshaker.  You can go slug hunting after it gets dark with a flashlight in one hand and a salt shaker in the other.  Slugs will immediately dissolve into nothing when a little salt is sprinkled upon them.  Try it and see!

Another way to get rid of these pests is to get them drunk on beer.  Use the twist-off lid from a jar and place it in your garden where slugs are feeding.  The beer acts as an attraction for slugs.  When they crawl into the lid full of beer the action of the alcohol in the beer also causes the slugs to dissolve.  The next morning if you don’t find the lid full of dead slugs or you will find you have a drunken raccoon on your hands.  A drunken raccoon can be pretty amusing in their own right. 

The watermelon way of getting rid of slugs can also be used and is quite effective.  This is especially so if you want to catch as many slugs as you can without exerting yourself.  After eating out the melon you are left with the rind.  Place the rind face down on the ground in your garden.  During the night the slugs will come for a feast, and the next morning they will all be on the face down melon rind.  Then you can catch them and dispose of them at your leisure.  Sometimes your friendly local raccoon will get to the slugs before you do having a fine breakfast of slugs.  This takes the execution of the slugs from your hands.

Instead of throwing away the dirty dishwater you can also use this waste product as another effective way to deal with slugs.  It seems that a weak solution of soapy water will also do these pests in by causing them to once again dissolve.

Kitty Litter is another way to get rid of these pests.  All Kitty Litter really is, is diatomaceous earth.  If you sprinkle this around in your garden it will also suck the water from the body of the slug the same way that salt does.

Another friendly animal that feeds on slugs is your friendly local snake.  Just don’t expect results if the poor fellow is plum tuckered out from supplying bites to people who only drink when they have suffered snakebite.

References:


Stonewalls last Forever


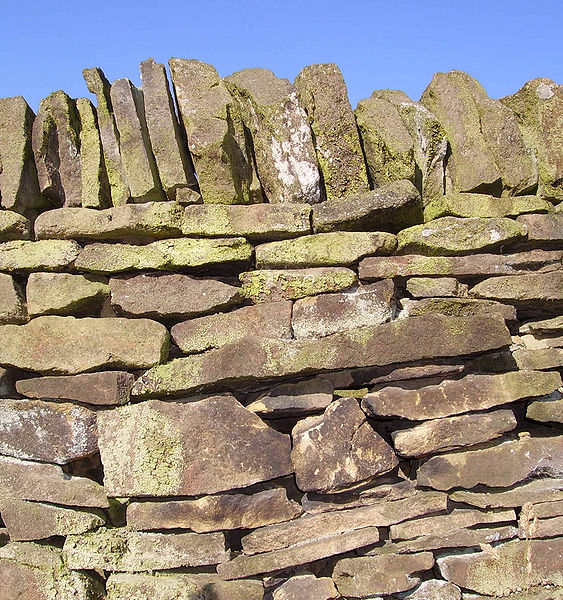
A dry stonewall that is centuries old
Photo by Emmanuel Giel


A stone wall is durable and a well built stonewall will last many lifetimes.  A fence made of wood will only last for 10 or 15 years before it is rotted away.  In New England building stone walls was a necessity because the fields literally grew a fresh crop of stones every year.  The stones were natural and not some kind of devilish crop foisted off onto the old-time farmers by an angry God.  This might be true, but many a New Englander thought otherwise.  Frugality was in a New Englanders’ soul however, and since the Good Lord provided these stones in such abundance the farmer figured he might as well use them.  His solution was to use of these stones to make walls around his fields.  These walls have lasted for centuries.

Although it may seem contrary to reason a dry wall built without using mortar is the most durable because it can breathe with the movements in the ground caused by frost, and other conditions.  A dry wall doesn’t need a foundation like most other walls or structures.  The stones are held in place by their own weight being acted on by gravity.

Building a stone wall is hard and tedious work that is guaranteed to give you big fat muscles and make you lose lots of weight.  Most stone walls are built using a string.  No they are not built from string; they’re built from stone.  The string is used to keep the wall straight while it is being built.  Don’t try relying on your evil eye for this part of the project as my Great Grandfather tried doing this once while he was building a house from stone.  He was a professional stone mason but he built a house that was 18 inches longer on one side then the other.  So much for his evil eye.

You will need some tools for this project;

A ball of mason’s twine
Several wooden stakes
Compass
Paper and pencil
Long handled shovel
Wheelbarrow of garden cart
Mason’s level
Stone chisel and a bullpoint
Masons hammer
8 Lb. hammer
3 pound hammer (engineers hammer)
Work gloves
Back support
Anything else that you can think of to make your work easier.

The handiest tool however for building a stonewall is a Bobcat skid steer loader.  Many of these tools can be rented, and returned to the rental agency when you have finished the project.  Other tools can be bought at your local hardware store or mason’s supply yard. 

The actual construction of the stonewall starts with the ball of mason’s twine and some wooden stakes in a straight line.  These can be lined up with a compass by sighting from one to another you'll be able to keep the line straight.  This establishes the line for the inside of your stonewall.  When building your stonewall you should always start with the largest stones at the bottom and as the wall becomes higher the stones become progressively smaller with the smallest stones at the top.  You can use small fragments of rock to prop up the spaces between the larger stones as you build the wall.  The mason’s level is mainly used when you are finishing the top of the wall so that it is reasonably level.  The top of the wall is also slightly smaller than the bottom.  This gives a cross-section through the wall a trapezoidal shape.

Two of the tools need some explaining a rock chisel has a chisel point and a bullpoint comes to a point.  The bullpoint is especially useful for breaking pieces off of larger rocks.  The rock chisel is mainly used to cut a relatively straight line from the rock.

If you build your stonewall of freshly dug or quarried rock like our illustration.  It will not have a patina of age about the stones.  It takes several years for this patina to develop, and this is one process that you can't hurry up, Mother Nature takes her own sweet time for this.  

A properly build stonewall is a thing of enduring beauty and can be often built in conjunction with other landscaping that will enhance your property.

The author has built several stone walls over the years as both dry walls and mortared walls.  Our description of building a stonewall is based on experience. Although one person can build a stonewall it is much easier work if more than one person is building the wall.  Regardless of how many people are working on the project it is still hard work.

Tuesday, June 19, 2012

How to care for Teflon Coated Pots and Pans


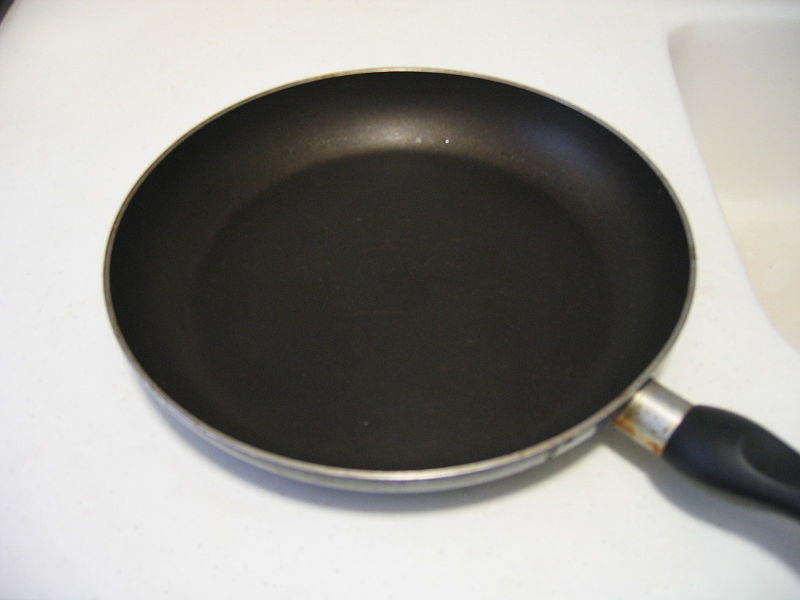
A Teflon coated frying pan
Photo by Wilfred Pau


Teflon® was invented by DuPont in the mid-20th century as a plastic fluorocarbon in resin that is applied to surfaces that are usually metal under an extremely high heat forming a nonstick coating. This is commonly found in using Teflon® coated pots and pans.

The original formulation has been greatly improved and has been marketed under several different names. During the 1980s Teflon® eventually evolved after several different variations into a product called Silverstone®. The big advantage is Silverstone it forms a more durable coating on pots and pans and other surfaces than the original Teflon. Both of these products are DuPont registered trademarks.

The first thing you have to do after bringing your new pot home from the store and before its first use is to properly condition it for use. This is done by wiping the Teflon coating with shortening. Never use any metal stirring forks or spoon's for mixing, nor cut anything up in the pan using a knife. It is not advisable to use any form of abrasives, scouring powders, metal pads or anything else that may damage the surface of the Teflon.

When you wash the Teflon coated pan you should do it with hot sudsy water to avoid staining. One of the things that you should not do is to let a Teflon coated pan sit overnight filled with water, this will damage the finish. You can wash pots and pans that have been coated with Teflon in the dishwasher without suffering any damage to the coating.

The most damaging thing to Teflon coating is to allow the charring of any food grease residues in the pan this causes dark-colored staining caused by overheating or incomplete cleaning. If this happens it can lower the effectiveness of its nonstick properties.

Under the right conditions the nonstick surface in your pots and pans can be renewed by removing any stains. This is done by adding 2 tablespoons of baking soda and 1/2 cup of liquid bleach with 2 cups of water. This will usually give you enough liquid to fill half the pan. Allow the solution to simmer in the pan for about five minutes. Remove it from the heat and check the Teflon surface, if the stain still is there you must repeat the treatment.

There is a caution doing this however; is the solution oils that will form foam and if this boils over it will usually stain the outside of the pan. The other thing to take into consideration is the fact that the solution is a very strong oxidizing agent that will cause some change in the Teflon coating with dark colors becoming lighter. This bleaching action however does not affect the nonstick properties of the Teflon.


Never substitute other ingredients for the baking soda, bleach or water. After you have cleaned your pan wipe it down with vegetable oil to recondition the surface of the Teflon before using it again. If you see any white spotted film that appears on the Teflon surface wipe it off with a soft cloth that is been saturated with lemon juice or vinegar by rubbing over the surface of the Teflon. After you're wiped off the pan wash and dry it, and condition it the same way you did when it was new.

Teflon® coatings that wear off can never be repaired at home. They have to be recoated using a very high temperature, which is not economical for the homemaker to attempt.

References:

Plastic Fluorocarbon FAQ, http://www.doityourself.com/stry/PTFE

Teflon® and Silverstone® are registered trademarks of DuPont.

Food to eat for Survival


Huhu grubs in rotten pine wood
Photo by Charlotte Symmonds


One of the things you learn in Survival School is that you had better not be squeamish because you will learn to eat some of the damndest things that have ever passed a human’s front teeth.  For starters, what would you think about eating a big fat grub?

Believe me you’ll think about that for a while before chowing down, and that is only the beginning.  By the time you get out of the school you’ll learn to eat anything that doesn’t try to eat you first.  As a matter of fact poisonous snakes don’t make bad fare as long as you get them first.  Contrary to popular belief they don’t taste like chicken either; more like snake.  The ones we ate were Eastern Diamondback Rattlesnakes, not bad when cut up into short segments and roasted on the end of a sharpened stick over an open fire.  But first you have to skin the snake, and they don’t die right away.  Neither does the snake’s head, so after decapitating the snake carefully bury its head deeply as it still is capable of delivering a lethal bite for several hours after being severed from the rest of the snake.  The rest of the snake is completely harmless, but full of bones.  The way we cooked it, it tasted slightly smoky from the smoke of our cooking fire.

Snake wasn’t the only strange thing we ate however, roasted alligator tail was another.  For the benefit of the curious we were in the Florida Everglades.  Alligator isn’t bad, but it needs to be tenderized before eating or it will be like gnawing on the front tire of a Payloader.  The way to tenderize one is to cut the tail into steaks about one half of an inch thick and then pound them with a length of wood until they are tender.  This is the same way that Californians deal with the abalone, a type of shellfish found off the West Coast of the US.

In the survival school you are taught to eat many things that you normally wouldn’t give house room too, such as grubs, insects, spiders, and just about anything else that wasn’t poisonous to your digestive system.  Among the more entertaining things that were used as a demonstration product was “muktuk,” this gastronomical treat is a chunk of whale blubber and skin that you could chew for energy.  This is usually eaten by the Inuit, the natives of Arctic regions.  It tasted like a cross between oil soaked cotton batten, which was the blubber.  The skin was more like a piece of old tire.  Obviously, the tire tasted better.

Generally, the diet was pretty high in protein, but there were some simple vegetable item added for variety.  One of these was quite interesting as it was the cambium layer from a tree.  This is the thin layer found just under the bark.  It is light in color, and to prepare it too eat you have to cut it into very thin strips before cooking.  You cook it by boiling it in hot water for several minutes, and eat it like spaghetti.  It isn’t very nutritious but it will provide enough calories to take the edge off hunger.

Another edible that we took advantage of in the Everglades was palm hearts.  This was the bud found at the top of a palm tree.  There are so many plants in the Everglades that this was about the only vegetation we dared eat.  I guess it is true that there are over 500 ways that you can die in the Everglades.

Another thing we learned was not to eat too many rabbits because although they are easy to catch the rabbit lacks body fat that we need to survive.  Rabbits are high in protein, but require that you find another source of fat to go with them, or you will starve to death in the midst of plenty.

From survival school the author determined that if someone wasn’t shooting at him the most likely place to survive is to head for a coastline of the ocean because there are so many things that you can scavenge from the ocean that you would never starve, and probably would be able to live a good life even though it is restricted.

Plucking the Marsh Marigold


Marsh Marigold
Photo by Plismo


In the early spring this plant is common in marshy areas or growing alongside streams.  The marsh marigold is noted for its beautiful yellow flower.  Marsh marigolds (Caltha palustris) emerge just after the snow melts and is one of the earliest wildflowers to bloom in early spring.  They are difficult to dig from their marshy habitat but make a welcome addition to a garden pool.  What is not readily known however is that these same marsh marigolds make an early season treat among those who are willing to brave the cold waters of their natural habitat to gather them. 

These plants carry a toxin that must be removed before eating.  From personal experience the author has found the best way to cook marsh marigolds.  You can remove the toxin by cooking them three times.  The first time cook them in lightly salted water; discarding this water after they have cooked for 10 minutes and are thoroughly drained.  Recook in lightly salted water twice until the marsh marigolds are completely cooked in a total cooking time of 30 minutes.  Remove from the cooking water and again thoroughly drain.  Serve with butter, salt and pepper.  Marsh marigolds are even better if they are allowed to cool for a day then heated up to serve.  The author also cooks them into an omelet, and has them for breakfast.

The marsh marigold is better known by its more common name, “Cowslip.”  As the cowslip it has been a food eaten by Native Americans for thousands of years.  It has also been enjoyed by White Men since the earliest days of settlement.

“English farmers have made cowslip blossom wine since Saxon times, as well as a pulpy jam for scones.  The flowers were also crystallized; used fresh in salads, or ground into a moist meal to be mixed with honey for a dessert filling.  Unopened cowslip buds can be pickled, and the leaves are used fresh as salad greens.”  Others do not recommend eating the leaves raw but rather they should be cooked and the water poured off to destroy a toxic alkaloid.  Livestock have been poisoned by eating too many of the plants when other forage wasn’t available.  Other writers also give various medicinal uses.  One of the old time remedies was its use to treat headache as a tea.”

An old time Saxon wine was made from cowslips as follows:

4 pounds of seedless raisins
2 pounds of sugar
Juice of 4 lemons; peels of two
4 gallons of water
2 pounds of cowslip blossoms

place the raisins, sugar, lemon juice and peel along with 4 gallons of water into a large pot.  Add the cowslips if they are in season.  Let this boil for one-half an hour.  Remove from the heat and let stand with a cover on the pot for three or four days, stirring twice a day.  Strain into sterilized bottles and cork tightly.  Leave space in the bottle for expansion so the force of fermenting doesn’t shatter the bottle.  Store in a cool dry, and dark place for at least two weeks before drinking the wine.

References:


Caltha palustris, Wikipedia the free encyclopedia, http://en.wikipedia.org/wiki/Marsh_MarigoldIn the early spring this plant is common in marshy areas or growing alongside streams.  The marsh marigold is noted for its beautiful yellow flower.  Marsh marigolds (Caltha palustris) emerge just after the snow melts and is one of the earliest wildflowers to bloom in early spring.  They are difficult to dig from their marshy habitat but make a welcome addition to a garden pool.  What is not readily known however is that these same marsh marigolds make an early season treat among those who are willing to brave the cold waters of their natural habitat to gather them. 

These plants carry a toxin that must be removed before eating.  From personal experience the author has found the best way to cook marsh marigolds.  You can remove the toxin by cooking them three times.  The first time cook them in lightly salted water; discarding this water after they have cooked for 10 minutes and are thoroughly drained.  Recook in lightly salted water twice until the marsh marigolds are completely cooked in a total cooking time of 30 minutes.  Remove from the cooking water and again thoroughly drain.  Serve with butter, salt and pepper.  Marsh marigolds are even better if they are allowed to cool for a day then heated up to serve.  The author also cooks them into an omelet, and has them for breakfast.

The marsh marigold is better known by its more common name, “Cowslip.”  As the cowslip it has been a food eaten by Native Americans for thousands of years.  It has also been enjoyed by White Men since the earliest days of settlement.

“English farmers have made cowslip blossom wine since Saxon times, as well as a pulpy jam for scones.  The flowers were also crystallized; used fresh in salads, or ground into a moist meal to be mixed with honey for a dessert filling.  Unopened cowslip buds can be pickled, and the leaves are used fresh as salad greens.”  Others do not recommend eating the leaves raw but rather they should be cooked and the water poured off to destroy a toxic alkaloid.  Livestock have been poisoned by eating too many of the plants when other forage wasn’t available.  Other writers also give various medicinal uses.  One of the old time remedies was its use to treat headache as a tea.”

An old time Saxon wine was made from cowslips as follows:

4 pounds of seedless raisins
2 pounds of sugar
Juice of 4 lemons; peels of two
4 gallons of water
2 pounds of cowslip blossoms

place the raisins, sugar, lemon juice and peel along with 4 gallons of water into a large pot.  Add the cowslips if they are in season.  Let this boil for one-half an hour.  Remove from the heat and let stand with a cover on the pot for three or four days, stirring twice a day.  Strain into sterilized bottles and cork tightly.  Leave space in the bottle for expansion so the force of fermenting doesn’t shatter the bottle.  Store in a cool dry, and dark place for at least two weeks before drinking the wine.

References:


Caltha palustris, Wikipedia the free encyclopedia, http://en.wikipedia.org/wiki/Marsh_Marigold

Plucking Fiddleheads:


Photo by Tammy


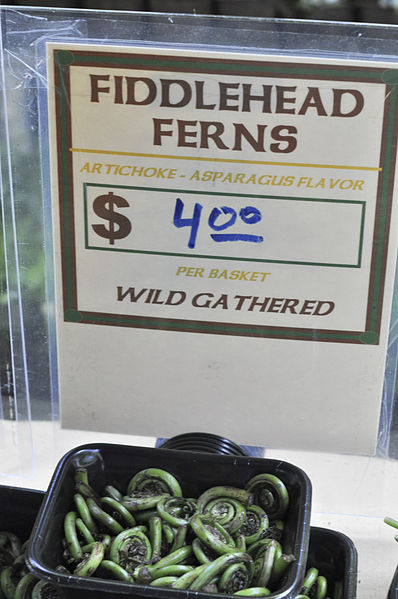
One of the first wild vegetables you can harvest in the early spring are ‘fiddleheads’ so named because of their resemblance to the stem of a violin.  They are actually the young sprouts of a fern and taste a lot like asparagus.  The fiddlehead unrolls as the young fern matures.  Some people know this as a crozier after the curved staff used by a Shepard or a bishop.  Fiddleheads are eaten as a cooked vegetable by many people.

Before they are eaten they first have to be cooked to remove a poisonous compound called ‘skikimic acid.”  This is accomplished by cooking them two times.  The first cooking is to remove the skikimic acid that is removed in the cooking process.  Water used in the first cooking should be lightly salted and is discarded once the cooking is complete.  Starting with fresh lightly salted water finish cooking the fiddleheads then serve with butter, salt and pepper.

The most popular ferns for plucking fiddleheads from are:

Fiddleheads are plucked in the early spring by plucking three fiddleheads from each fern plant.  Fern plants usually have seven fiddleheads per fern plant.  By harvesting only three fiddleheads per plant you will prevent the plant from dying.  These are wild plants and are not farm raised as many of our vegetables are.  Because they are wild sustainable harvesting methods are important for ferns or any other wild food plant.

Most of the fiddleheads in the Northeast come from the ostrich fern.  The fiddleheads appear in the early spring (April of May) and should be harvested then.  They can be served like asparagus on toast, or chilled can be used in a salad with onions and vinegar.

“The Center for Disease Control (CDC) has investigated a number of outbreaks of food-borne illness associated with fiddleheads. The implicated ferns were eaten either raw or lightly cooked (sautéed, parboiled or microwaved), which was what caused a food-borne illness outbreak in British Columbia in 1990. Although a toxin has not been identified in the fiddleheads of the ostrich fern, the findings of this investigation suggest that you should cook fiddleheads thoroughly before eating (boil them for at least 10 minutes).”

To save for eating later in the season fiddleheads can be frozen by preparing then as you would for the table.  You can do this by blanching the fiddleheads for two minutes.  Cool and thoroughly drain.  Place the fiddleheads into moisture and vapor proof containers and place them into your freezer.  Recook for 10 minutes before eating.

References:

U of Maine, Facts on Fiddleheads, http://www.umext.maine.edu/onlinepubs/htmpubs/4198.htm

Fiddlehead Fern, Wikipedia the free encyclopedia, http://en.wikipedia.org/wiki/Fiddlehead   

Homemade Sausage:


Grilled Sausages
Photo by Salim Fadhely


Sausages are delectable little bits that are usually made of scraps of meat and fat leftover from butchering.  The animal that is used most often is a pig although sausages can be made from any other meat and fat combination.  Most of us are familiar with breakfast sausage and breakfast patties.  However, this is just a sampling of what else is to be found in the world of sausages.  So are hotdogs.

Not only are sausages made from ground up meat and fat scraps but they are also seasoned with herbs and spices to improve their flavor.  The common breakfast sausage is seasoned with the herb “Sage” that gives it its distinctive flavor.  Kielbasa is another form of sausage made from a combination of pork and beef although the best ones are made from beef alone.

Even blood enters into the recipes for sausages, and these sausages are common in northern Europe, and have followed our European Ancestors to the Americas.  The blood sausage has vegetable fillers added as many other types of sausage do as well.  Commonly this filler is nothing more then oatmeal.

Another form of sausage was developed by the Indians that we all know as Pemmican.  This was made in patties and used as survival food or when the Indians were traveling and needed a high energy food.

The most unusual sausage the author has eaten is made from venison by a Canadian friend that seasons them with habanera peppers, the hottest one the Scotch Bonnet.”  They’re so hot they will make the sweat run down your back.  He produces these commercially for the islanders in the Caribbean.

Most sausages are incased in a length of natural gut, usually a piece of sheep gut that has been thoroughly cleaned and washed.  This is the most expensive product produced in the slaughtering of animals.  The seasoned meet is forced into the length of gut under pressure by a special machine made for this purpose although it can be accomplished with a meat grinder that has been equipped with a special nozzle.  To find the proper equipment you should Google, sausage making supplies.

In the process of making sausages you can use your adventurous spirit and see what you’re are able to invent yourself.  More then once a really good recipe is able to be developed commercially.  Several sausage makers have gone on to set up shop in their towns and have earned a good living making sausages.

Making Pemmican the Indian Way


Cree Indian in the old days


Pemmican was derived from its use as an emergency food by the Cree Indians in Canada.  It is made by preparing strips of game meat such as bison, moose or venison by drying them either in the sun or before a campfire until they were hard.  The meat was then pounded into a powder using stones, and mixed 50/50% with fat from the animal.  A mixture of berries was pounded into the pemmican for additional flavor and added nutrition.  Ordinary pemmican was made from dried buffalo meat and fat.  By adding berries to the pemmican it was more apt to spoil.  Ordinary pemmican however was still edible after as much as 30 years.

The Métis central Canada native people who made their living trapping eventually became the biggest suppliers of pemmican.  They supplied it to the Canadian government the Hudson Bay Company, the US government and anyone else that bought the stuff.  Making pemmican was actually a work for the women of the group.  They used to cut the lean buffalo meat into strips about a quarter of an inch thick and hang on a rack made out of willow twig bows that were interlocked in such a way as to form a framework.  The buffalo meat was hung in this rack and was either dried by the hot sun or place close to an open flame.  The finished product of this step we’re all familiar with as jerked beef.  It was dry and hard.  The womenfolk pounded it into a powder between two stones.  When the meat is thoroughly powdered it was placed in a kettle and an equal volume of hot water was added.  This was thoroughly stirred together with the powdered meat forming ordinary pemmican.  They then poured it into rawhide sacks for storage.  While the mixture was in the sack and still hot they trod on it with their feet in order to flatten the pemmican into a slab for later use.  If they were going to make what was called festive pemmican they added fruits and berries, but this kind of pemmican did not have been keeping qualities of ordinary pemmican.

Monday, June 18, 2012

Making home made Ice Cream:


Strawberry ice cream with strawberries
Photo by Lotus Head


When the author was a child his mother used to make the greatest icecream that was far superior to anything that was store bought.  Among her equipment for making ice cream was an old fashioned icecream freezer that was a wooden bucket that you filled with ice and rocksalt.  This provided the cold for the icecream.  There was a cylindrical container that was immersed in the ice mixture that had a set of paddle wheels inside of it that were turned by a crank that all of kids took a turn at cranking.  Today you might find one of these ice cream freezers in an antique shop if you’re lucky.

However, they are still produced as churn type ice cream makers both with an electric motor or a hand crank.  The process hasn’t changed either.  The basic recipe for icecream is as follows for a simple vanilla ice cream:  You can find these devices on the Internet by Googling – ice cream freezers.  There are several additional styles available too.

1 cup of white sugar
1 cup of milk
2 eggs
2 cups of heavy crème
1 ½ teaspoons of vanilla extract
1 tablespoon of fresh lemon juice

Start with a medium pan over a low heat and stir the eggs, milk and sugar together until they are thoroughly blended and the sugar completely dissolved.  Keep stirring until the mixture gets thick enough to stick to the back of your stirring spoon.  This will take from 10 to 20 minutes.  When this happens remove it from the heat and let the mixture cool.  At this point the mixture is custard.

Using a medium bowl whip the heavy cream with an electric mixer or a metal whisk until the cream forms soft peaks.  Then you beat in the vanilla (or other flavoring of your choice). 

Fold the whipped cream into the mixture you have just prepared, and chill in a refrigerator for at least 8 hours, but better overnight.

Stir the mixture again to recombine the ingredients.  Then place it into an ice cream maker until it has picked up enough air bubbles to make it slightly frothy and frozen to a consistency like ice cream that has partially melted.  The last step is to place it into a container and place it into a regular freezer until it is firm.  At that time it is ready to be served.

This is the recipe for a basic ice cream you can add fresh fruits that have been cut up or chocolate syrup or small chunks of chocolate.  You can also add spices and herbs to the basic mixture to create different flavors.  If you like to experiment you can even create your own flavors.  The wildest one the author ever heard of was dog bone, made from crumbled dog bones.


The History of Food Chemistry


Filled tomatoes
Photo by Dnor


Food chemistry's history dates back as far as the late 18th century when many famous chemists were involved in discovering chemicals important in foods, including Carl Wilhelm Scheele (isolated malic acid from apples in 1785), and Sir Humphry Davy published the first ever book on agricultural and food chemistry in 1813 titled Elements of Agricultural Chemistry, in a Course of Lectures for the Board of Agriculture in theUnited Kingdom which would serve as a foundation for the profession worldwide, going into a fifth edition.
In 1874 the Society of Public Analysts was formed, with the aim of applying analytical methods to the benefit of the public[1]. Its early experiments were based on bread, milk and wine.
It was also out of concern for the quality of the food supply, mainly food adulteration and contamination issues that would first stem from intentional contamination to later with chemical food additives by the 1950s. The development of colleges and universities worldwide, most notably in the United States, would expand food chemistry as well with research of the dietary substances, most notably the Single-grain experiment during 1907-11. Additional research byHarvey W. Wiley at the United States Department of Agriculture during the late 19th century would play a key factor in the creation of the United States Food and Drug Administration in 1906. The American Chemical Society would establish their Agricultural and Food Chemistry Division in 1908 while the Institute of Food Technologists would establish their Food Chemistry Division in 1995.